From S.H.O.
In Phase 5…
• First on the list is to prepare a heavy duty basket for holding the S.H.O. Drive.
• Second is to insert the S.H.O. Drive into place.
• Third is to secure the meters onto the basket.
• Fourth is to test and run the drive motor again as per procedure described in Phase 4.
Carrying crate
(Top)
| Crate
(Phase 5 Parts)
• Now to prepare for portable testing!
• I have purchased a Supreme Stacking Crate from IRIS USA through Amazon.com |
| Quality Parts
(Protocols)
• This crate from IRIS USA takes advantage one of the strongest engineering shapes, the triangle.
• The minimal material on the sides of the crate will minimize air flow disruption.
• The bottom also consists of minimal material, which allows for transparent viewing from beneath. |
| Transparency
(Protocols)
• This durable, light-weight crate will enable operation of the S.H.O. Drive with the fan enclosed from every side (except the top).
• It helps that this crate is white, as it will maximize the ambient light inside the crate. This makes it easier to view (and record) what is inside. |
| Wooden Panels
(Compatibility)
• The lattice of the crate will visually complement the “house shaped” wooden panels used in the support structure. |
|
Inserting the S.H.O. Drive
(Top)
| Nylon Fasteners
(Phase 5 Parts)
• In order to prevent the S.H.O. Drive from sliding front-and-back inside the crate, I will insert pairs of Hillman 5/8" Nylon Cable Clamps from Lowes back-to-back, with their ends stuffed into small square holes at the floor of the crate. |
| Protective Edge Trim
(Parts)
• In order to prevent side-to-side movement of the S.H.O. Drive, I will use U Shape Car Door Edge Guard Trim from CarBeyondStore at Amazon.com at the floor of the crate. |
| Protective Edge Trim
(Parts)
• This protective edge trim is clear so as to be visually non-intrusive.
• It will be cut into measured pieces and adhered to various sections on the crate.
• It will secure the S.H.O. Drive laterally, but not vertically. |
| Angled Base Blocks
(Compatibility)
• Now it is time to insert the S.H.O. Drive into the crate!
• By angling the base blocks by 45 degrees, the top of the fan area will be below the top of the crate.
• The tilt of the base blocks will also promote ambient light scattering as well as make it harder to conceal any hidden parts. |
|
Securing the meters
(Top)
| Nylon Pipe Cleaners
(Phase 5 Parts)
• These nylon pipe cleaners go by the name Creativity Street Colossal Stems and I purchased them from an Artist & Craftsman Supply store. They are 19.5” (or about 50 cm) long. |
| Rubber Holsters
(Compatibility)
• Both the Sinometer VC6243+ LC meter and the Extech 411 True-RMS Multimeter have (color-matching) kickstands as well as slots on their (color-matching) protective holsters intended for holding test leads.
• These features can be fastened to the crate horizontally and vertically with (color-matching) nylon pipe cleaners. |
|
Portable test
(Top)
| Multi-hour Test(Testing)• The following will be tested: • Resistance • Inductance [ f(position) ] • R.M.S. Voltage [ f(r.p.m.) ] • Rotational Speed • R.M.S. Current • Temperature [ +references ] • Refer to procedure laid out in Phase 4. |
|
April 2016 Presentation
(Top)
| I
|

Introduction
Summary of measuring devices, back up and safety equipment, and camcorder (+accessories)
|
| 1
|

Phase 1
Holes, brass hinges, square nuts
|
| 2
|

Phase 2
Neodymium magnets and bearings
|
| 3
|

Phase 3
Spool, coils, and ceiling hooks
|
| 4
|

Phase 4
No hidden batteries, increase rigidity, hex nuts, terminal rings, toggle switch, fan blades, and extended test run
|
| 5
|

Phase 5
Heavy duty basket, S.H.O. Drive insertion, secure meters, and portable extended test run
|
| 6
|
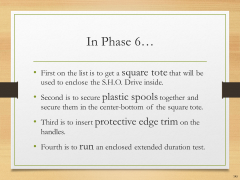
Phase 6
Square tote, plastic spools, protective edge trim, and enclosed extended test run
|
| 7
|

Phase 7
Prepare elevated test platform, outdoor test setup, camcorder hookup to portable power, and outdoor extended test run
|
Site map
HQ ● Glossary ● April 2016 Presentation


![Multi-hour Test(Testing)• The following will be tested:• Resistance• Inductance [ f(position) ]• R.M.S. Voltage [ f(r.p.m.) ]• Rotational Speed• R.M.S. Current• Temperature [ +references ]• Refer to procedure laid out in Phase 4.](/now/File:Let%27s_Build_the_S.H.O._Drive!_-_Slide_144_of_176.png)